
needle felted fantasy creations, cloth art dolls and more from the mind and hands of Irma Hoani...
Showing posts with label falkor. Show all posts
Showing posts with label falkor. Show all posts
Friday, July 23, 2010
Now on Ebay: Falkor the Luck Dragon Doll (Relisted)

RELISTED- 3 day auction only. Closes Monday July 26, 2010.
Falkor is now available to purchase on Ebay. Please pass along to anyone you think might be interested and happy bidding!
Monday, July 12, 2010
Falkor the Luck Dragon Art Doll

"Leaving so soon? Hmmmm?"
Atreyu stammers "I was just going to..."
"...Sneak away? I like children."
"For breakfast?"
and that booming laugh.
"Never. I'm a luck dragon. My name is Falkor."

I present Falkor the Luck Dragon from The NeverEnding Story. Falkor is my most ambitious project to date and has been a labour of love. Many, many hours have gone into his creation as I worked on him for 2-6 hours a day over a period of three weeks.

His body is firmly felted over a strong wire armature with a core of merino wool and over that is a layer of snow white merino/silk (80/20).

Falkor's scales are hundreds of glass seed beads, iridescent beads, frosted beads and natural New Zealand shell beads that were individually sewn in.

Once his beadwork was complete, I carefully hand rooted his coat of "fur" with mulberry silk in very small sections to make his coat natural and uniform.

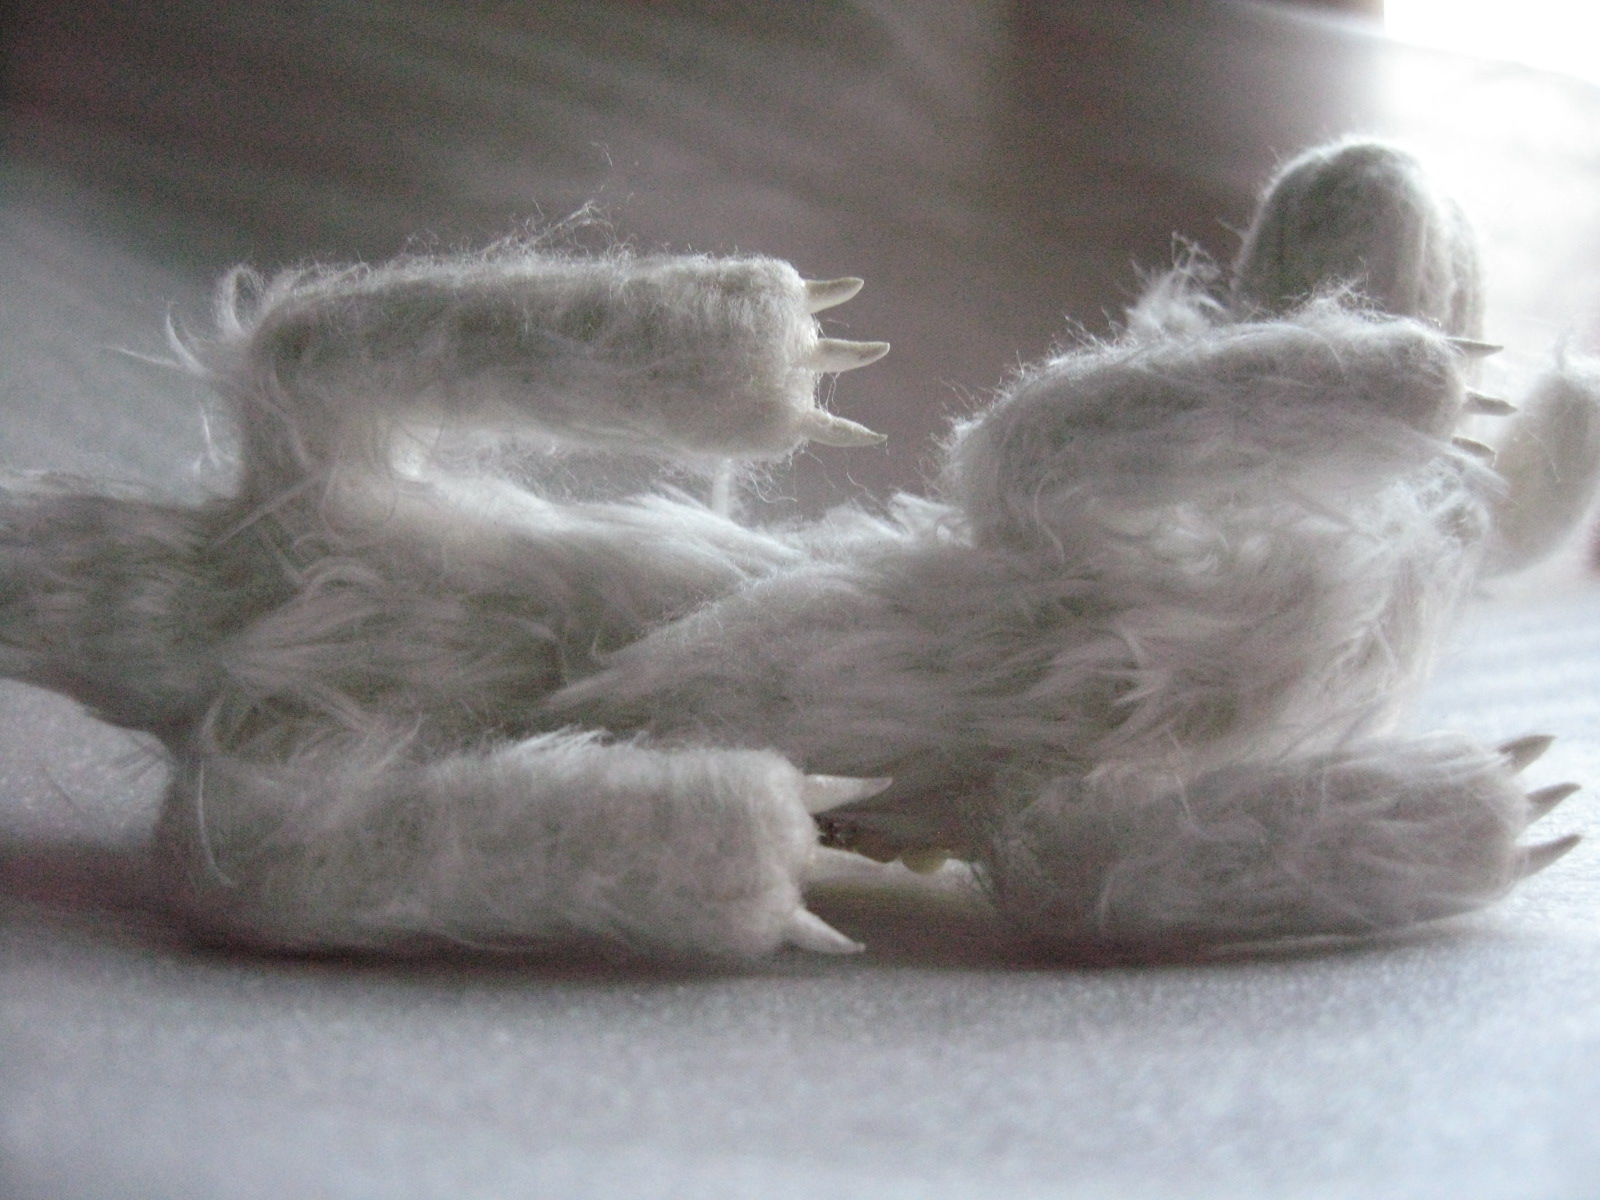
Falkor's claws are sculpted of paperclay and were painted with a shimmery white acryic paint and finished with a satin finish waterbase varnish.

His eyes are acrylic gold doll eyes that have been carefully set.

Falkor is 11 1/4 inches long and 1 3/4 inches tall. He can be posed gently.

Falkor will come to you with a signed and dated tag.

To see Falkor come to life, view his work in progress post.

More photos on my Facebook Fan page.


Falkor has been SOLD, but a custom order is always available.
Saturday, July 10, 2010
Falkor: Work in Progress (UPDATED July 11!)


***Scroll to the bottom of the post for updates!***
Falkor has been coming along great. I have his body completely finished and fleshed out. Today I started the very long process of applying all of the beadwork for his scales.

Here is his body. I felted a firm core of merino wool over a strong wire armature. I then applied another layer of merino/silk (80/20) over that to make his colour uniform.

After fleshing the body, I felted his paws. I have yet to make his claws, which I am sculpting of paperclay.

I have not yet attached his head. I am waiting to complete the scales and will then attach his head and add his adorable long floppy ears. This will be done right before I add his coat of luxurious mulberry silk.

His head and face came out perfect. I spent hours poring over the internet looking for good movie stills and YouTube videos. I wanted to capture every single feature on his face to recreate his expression in wool.

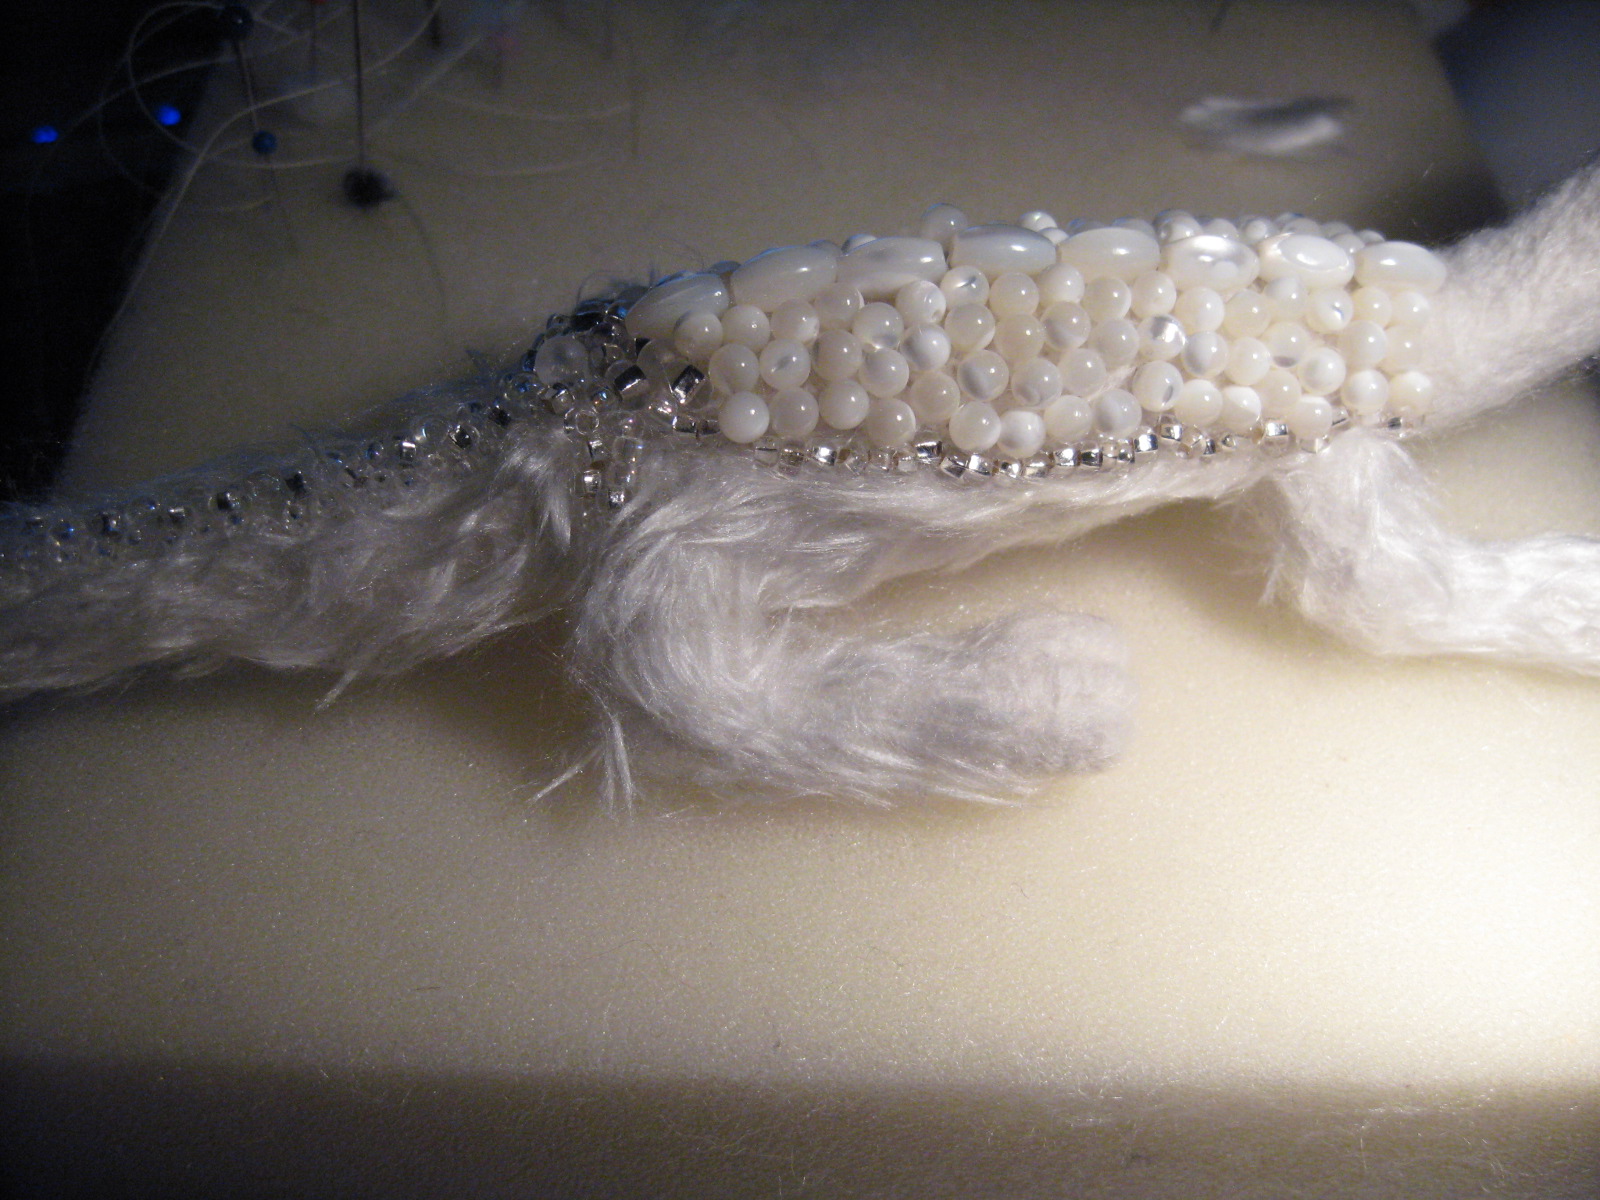
Here is the beadwork I have done so far. I have sewn on hundreds of clear and iridescent glass seed beads. I also bought some cream coloured glass pearls and some gorgeous cream/iridescent New Zealand shell beads. I am still trying how I am going to incorporate them in and transition from the clear to cream.

It is very hard to capture how this looks in a photograph, but here is a portion of the tail that I have completed. I have many more hours of sewing to go and then the hard part: felting in tiny sections of mulberry silk, trimming to the proper lengths and rooting it properly.
What do you think of Falkor so far?
****************************************
Update 5/7/10 (New Zealand Time)
I've got most of the beadwork done and attached his head. I've also added more definition to his face. Here are some pics of the additional work done:


****************************************
Updated 6 July
Today I started hand rooting Falkor's silk coat. This is very labour intensive, but worth every minute!


***********************************
UPDATED 7 July
Slow going, but still happy with the direction I chose to take with this piece. I suppose I could have just felted everything and called it a day, but I really wanted to make this as true to the original as possible.
Here is a quick tutorial on how to root fibre. I am using this technique to add Falkor's fur. It is a very time consuming process which is why this will take me a few days to finish.
First, take a small length of fibre. I am using mulberry silk as fur in this instance. I am using about 1/4" widths or less.

Next, root the fibre in. I find that a fine needle like a 40 triangle works best for this. You want to place the end where you want it to be rooted. Felt in against the edge, leaving the rest loose. Do not felt any more than the edge. Think of your scalp :)

Gently give it a tug once you have felted the edge in. If fibres start to pull away, go back and felt them in a little more.

Once you have made sure it is felted in securely, cut away the remaining length. I cut it on a diagonal and in different directions for a more natural layered look, rather than cutting straight across.

Gently comb the section with your needle, spreading it out to make the fur uniform with the rest. Repeat the whole process from step 1, moving up a few millimeters each time so there are no gaps and the fur looks full and natural.

After several hours, I am 2 1/2 inches up his tail. Be patient and take your time for good results.

********************************************
UPDATED 10 JULY
I've been ill the last couple of days so I haven't finished Falkor yet. I am hoping to have him done tomorrow or Monday at the latest. Still about a good 4 hours of work to be done as far as scales on his neck, rooting the fur on his neck and face, making and attaching his ears and attaching and painting his claws.
Rooting his fur has taken me a few days as this is really detailed work that is labour intensive. Here are some shots to show his progress so far.


********************************************
UPDATED 11 JULY
Falkor is just about completed. His claws have cured and I will attach them tonight and paint them tomorrow and that is it. This journey has lasted me much much longer than my originally anticipated 30 hours. I would put the work completed at around 70-90 hours. I have no way of knowing. I spent 2-8 hours a day on him (4 hours today alone). So here are pics of him completed. His glamour shots are to follow in his "completed" post.


What do you think? I have been toying with just opening his other eye. Maybe it is because I have been staring at him for three weeks. I have lost all objectivity in this project. :)
Subscribe to:
Posts (Atom)