Showing posts with label felted. Show all posts

Monday, September 13, 2010

Ludo: Work in Progress


Almost there!!!

Just a bit more fur to apply! Once I've completed his second layer of fur, I will do whatever clean up work needs to be done and a little bit of paint. I am hoping to have him done tomorrow.

I am now accepting enquiries for Ludo. If you are interested in purchasing him, please contact me.

_______________________________________________________________________


***Updated 10 September 2010 

Reaching the home stretch on Ludo! His horns and fangs have been sculpted and cured. I've painted his horns and his fangs will be painted later.


I am still building out his flesh to get his body just right. I've also worked on his facial structure and features once his fangs were set.


His horns have been placed and I will continue building out his neck and back. Once this is done, I will start applying his fur.


I have painted and distressed a wooden base. It is done in layers of green, silver, iridescent white, burnt umber and terra cotta. Layers were painted, sanded and distressed, then covered in a satin varnish. There is a felt backing. The plaque is artist grade plastic that was hand drawn in archival ink and gel pen and coloured in pencil. I am still deciding how I am going to attach the plaque and Ludo.


More to come soon!


_________________________________________________________________________

***Updated 4 September 2010
 In the last 24 hours I have got a lot done on Ludo! Here is where he is at as I write this (above). 


To construct his hands, first I made a palm out of a plain NZ Corriedale wool. I then rolled out three fingers in the blend I have created for Ludo (brown, nutmeg and grey).


Once the fingers are felted and firm, I attached them to the palm.


 I then add  the skin colour to blend everything.


Completed hand on left. 


Once his hands were done, I got to work on the feet. I started by building on the foundation layer.


Completed feet with toes added.


With his feet on, I could then add Ludo's "skin".


His entire body has to be covered in this blend to make his colouration uniform. Here I am adding a bit more to flesh out his belly.


I have just attached the head and am connecting and felting it permanently to his body.


More to come!!!!
 _______________________________________________________________________________


"Hello!!!"

After a long hiatus due to computer issues, I have begun work on Ludo once again. I am so pleased to get back to this sweet ol' beast! My new laptop has a nifty program where I can snip bits of my screen and I spent a good part of the morning watching Labyrinth and taking the best poses of Ludo to help me in his fabrication.

This morning this as far as I had gotten (above). His head was mostly done and his body had only started to take shape. I spent lots of time studying his body shape and movements and started to flesh him out.


Ludo has a very unique body shape and I want to stay true to the original. His core is New Zealand Corriedale wool. 


He is shaping up very nicely! Once I have his core felted and shaped up the way I want, I will construct his hands and feet right onto the armature in the colour I have blended for his body. Then I will cover his body in that blend to make his colouration consistent.

***Updated 3 September 2010
________________________________________________________________________________


I have been working on Ludo over the last few days. I'm very excited to finally start on the lovable beast from Labyrinth. A few days ago, I created his head. I first started with the general shape of his head and set his eyes.  I decided to go with a blend of wools to get his colouration as close to the original as possible. I don't have hand carders so I just pull all of the colours by hand until they are satisfactorily blended.  I am using a blend of grey and brown merino with nutmeg New Zealand Corriedale wools.


I spent a good while watching Labyrinth, freezing the frames to get different angles of him and did a few rough sketches for proportion and to get a better feel of his shape. I'm very fussy about scale. I want all of my recreations to be as true to the original as possible.


Here is a shot of me adding on his upper lip. Basically felting is just building shapes on top of shapes and joining them. I consider it to be closest to pottery or sculpting in clay which is something I enjoyed very much in high school (it was my favourite class!). You build a foundation shape, then felt on the next bit and so on and so forth. Sometimes I felt the next piece I want on first, other times I just do it freehand as in the case above.


Mostly finished head! His brow still needs to be defined more and he is of course missing his horns, ears and fangs but they will be added at a later date. I decided to sculpt his fangs as well as his horns out of paperclay which is a really great medium. It is a paper based clay that air dries (no need to bake) and is very hard when cured. The best part is it is extremely lightweight so it won't weigh down my very light felt creations.

His armature was made today and I started wrapping and felting the core wool onto his frame. Should be a day or so and I will have a body to show you.

Until next time...

Tuesday, July 20, 2010

FREE Custom Creation* Giveaway!!!


Yes, FREE! I will give away one custom Faerie Bearie, animal or baby dragon up to a $55 USD value. The prize includes shipping. There will be no cost at all to the winner.

How? Just follow my blog!

I am running this giveaway promotion to increase my blog readership and traffic to my Etsy shop and Facebook page.

The terms are simple: follow my blog using the Google widget in the lower right hand of your screen and you will be automatically entered!  You must follow publicly or I cannot see you and you will not be entered.

Current blog followers will be automatically entered, you don't have to do a thing.


Refer a friend and get +1 entries into the draw! To get the +1, please have your friend leave a comment in this post stating who it was that referred them and I will add an entry for you.

Purchase any doll (micro or tiny dragons excluded) from my Etsy shop and receive +10 entries into the draw! Please leave a comment in note to seller that you are a follower and I will add these upon verification.

*****

The drawing will take place once I have reached 100 blog followers. If I reach over 100 in one day, the followers who joined up until the end of that day 11:59pm New Zealand Standard Time will be included.

I will notify the winner immediately following the drawing. By entering the contest, you give me express permission to use your name or other online handle to announce the winner in a blog post and on my other related sites.

If you choose to follow my blog and want to opt out of the contest, please email me with your Google ID and you will be removed from the draw.


No purchase necessary (unless you want +10 entries--see above).


Thank you for helping others discover my work and good luck!


I reserve the right to modify the conditions of the giveaway at any time. If this occurs, I will notify all participants through this post and through my Facebook page.

*Custom unicorn/pegasus is excluded from this promotion.

Friday, July 16, 2010

Matchbox Monsters!


Introducing my new line of dolls: Matchbox Monsters! This line will be of tiny horror dolls that live in their very own hand decorated matchbox.


Brainz is #1 in my Matchbox Monsters line and is a needle felted zombie. He stands just 1 7/8 inches tall.


Looks like Brainz just finished dinner! He is carrying a skull with long hair and a bead adornment. His arms and head are thread jointed.


Brainz is sculpted of a merino/silk blend and his pants were felted of merino wool. His hair is Tibetan lambswool locks. His eyes are glass seed beads and his mouth was hand stitched.


 Brainz's box is 2 1/8 inches long and 1 1/8 inches tall. It slides open like a matchbox. I have painted it with green and orange acrylic paints and decorated it with skulls in gel pen.


They are tiny and very portable, so you can take them with you anywhere and they will keep you company and bring you luck :)


Brainz has been sold, but custom orders are always available.


Monday, June 28, 2010

Say Hello to Falkor!


I know I said I wasn't going to show any work in progress shots of him, but I feel like a kid on Xmas Eve! I just have to shake the present and maybe peel the corner of the wrapping paper back...just a little...

I spent a good 4-6 hours on Falkor's head. I lost track of time and I don't usually work in solid blocks unless I get into my "artistic zone". I work at my desk and my laptop is always sitting here tempting me to look at amusing blogs or Etsy shops.

I spent heaps of time researching this handsome fellow. I pulled as many images as I could off of the web and found some great YouTube videos. I also discovered I don't own this movie on DVD. How is that even possible? I've got Willow, Labyrinth, The Princess Bride and The Dark Crystal (some of the best fantasy movies of the 80's!). How is The NeverEnding Story missing? I am at a loss as to how that happened.


This is probably the most detailed head I have ever made. There are layers upon layers that just aren't captured here in these photos. I have a sinking feeling that once he is completely done that photos will not do him justice. When I was applying and shaping his eyelids, I decided to keep one eye closed for that classic wink! The buyer will have the option to keep him this way or for me to open up the eye.

I am very pleased with how he has turned out so far and I am currently working on fleshing out his armature. I am using a merino wool as the core, wrapped over the wire. Once I have him fleshed out, I will do the final layer in the same gorgeous snow white merino/silk (80/20) blend that his head is made of. His back/scales will then be applied. I am using glass beads all the way down his back in an array of whites and irridescents.

Once the bead work is done, I will spend many, many hours applying his coat. I will apply layers of mulberry silk in small sections. I have yet to sculpt his paperclay claws.

Typing all that made me realize I need to keep going! Back to work for me!

If you want more updates on Falkor, other works in progress, new available works and other things & stuff, become a fan on Facebook.

Until next time, Dreamers!

Friday, June 25, 2010

Falkor the Luck Dragon!


The NeverEnding Story is probably one of my favourite movies of all time. I must have watched it hundreds of times as a kid, so I've thought that at some point in my life I have to recreate my beloved Falkor - and that time has come.


Falkor the Luck Dragon is on his way! I will not be doing a work in progress post of him on my blog.* I am estimating 30 hours of work will go into his production. I expect to have him completed in 2 weeks, but that will depend on how I'm feeling and if I decide to make other dolls in between to break it up a bit. 


His armature is 12" long and he will be roughly 1 1/2 - 2 inches tall.

Falkor will be constructed of a merino/silk blend (80/20). His coat will be mulberry silk and he has lifelike acrylic eyes. To capture the look of the puppet used in the movie, his scales will be white glass beads. I am tentatively pricing Falkor at $300. This is subject to change.

If you would like to contact me with an expression of interest or to reserve Falkor, please email me.

Didn't we all wish we were Atreyu as kids? 


*Edit: I may post work in progress updates from time to time because I have received a remarkable amount of interest in this piece.  :)

Monday, June 21, 2010

Realism in Fantasy


I'm often asked how I get my felts to look so "real". Considering I do fantasy creatures, that puts a smile on my face. But really most, if not all, are derivative of actual real live things. One of the things I do, and have always done is to use images as a point of reference.

In the good old days before the internet, I used books. My father had a massive library of art books and other neat books that I could use for inspiration or reference. I still do that to this day, but Google is my best friend.


When creating Frosty, my first felt, I used Google images for everything on this little guy. From the shape of his nose to the placement of the eyes and type of claws I still wanted him to have true polar bear qualities.


I did the same thing with my squishy panda. After watching the Panda Cam of the San Diego zoo pandas, I just had to make one! I used heaps of images to get the face just right!


And really, what is a dragon? A giant lizard. I kept iguanas as pets for many years and loved their form, shape and mannerisms. I can still see a little bit of my iguanas, Renfield and Squee, in my dragons.


I don't really use photos as point of reference for them, because I spent so much time around lizards, and I think that is apparent :)


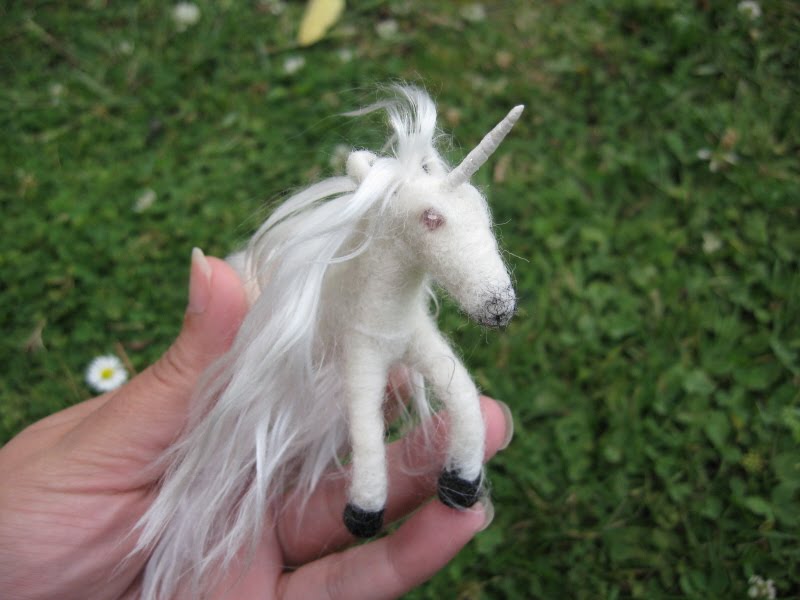
As far as unicorns go, it's really a white horse with a horn glued (or stapled!) on. It reminds me of the movie "Scrooged" when the prop man is trying to glue antlers onto a mouse. Tried to find a screen grab of this, but couldn't find one!


I use photos of horses to get the body shape right, and sculpt a horn from paperclay. It's quite tricky getting the shape right, but with the right amount of practice, you can create anything. I highly recommend using wire armatures as well. It's great to have the basic body structure there in front of you, and then you just build on that. I hope to put an armature tutorial on here one of these days, I just have to get around to taking photos while I am making one.


So there is my tip for any aspiring fantasy or animal artists. Always use photos for reference. Try to get different angles and poses. I keep multiple windows open while sculpting.

Felt really is an amazing medium. I used to make classic plush dolls, but I find felting a much more forgiving medium and I feel (sometimes) that I can get much more creative with it.

For anyone looking to start out felting and don't know where to begin, I highly recommend Living Felt. I started out with the bear kit and have never looked back! There are really great step by step instructions to get the basics down and it is really easy and FUN! I can't say enough about this shop and how great the supplies are, and the owner Marie is really lovely and helpful.

If you have any questions you would like answered, or are looking for tips and tricks, email me and I'll get back to you as soon as I can, or will post regarding your subject of interest.

There are no limits to the imagination!

LinkWithin

Related Posts with Thumbnails